Nowadays, with the advanced facilities of our supermarkets, getting chickens, hens, and turkeys ready for cooking is as simple as unwrapping a package. When it comes to preparing poultry for the perfect roast, two techniques often spark culinary debate: spatchcocking and brining. Whether it’s the robust flavor of a wild turkey breast or the tender succulence of a chicken, understanding the nuances of these techniques can elevate your culinary game.
But the pivotal question remains – should you spatchcock your chicken before or after brining?
Spatchcocking, a method that involves removing the backbone to flatten the bird, ensures even cooking and a beautifully crisp skin. Brining, whether dry or wet, infuses the meat with moisture and flavor, making every bite succulent and rich.
Whether you’re gearing up for a festive feast or a casual Sunday dinner, understanding these techniques can elevate your poultry preparation to new heights of culinary excellence.
Whether you’re gearing up for a festive feast or a casual Sunday dinner, especially if you’re a fan of Butterball turkeys, understanding these techniques can elevate your poultry preparation to new heights of culinary excellence.
But a question that often puzzles both home cooks and culinary enthusiasts alike is: should you spatchcock the bird before or after brining?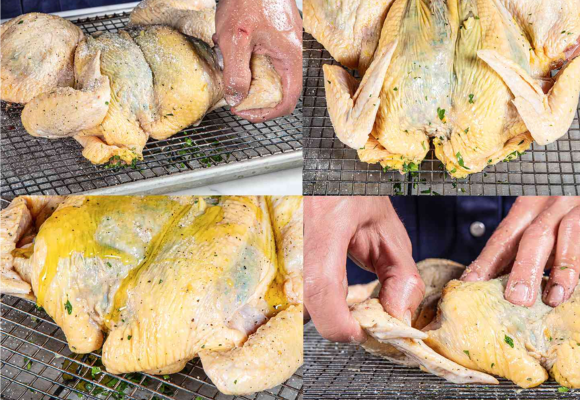
spatchcock before or after brining
The sequence in which you apply these methods can impact the final outcome of your dish. Should you spatchcock before or after brining? Let’s explore both approaches to help you make an informed decision.
Spatchcock Before Brining
When we consider the sequence of preparing poultry for a sumptuous meal, the method of spatchcocking before brining holds a place of significant interest.
Brining is a culinary technique that enhances the flavor and moisture of poultry, and when it comes to preparing a chicken, spatchcocking before brining can make a significant difference. Spatchcocking, also known as butterflying, involves removing the backbone and breastbone of the chicken to allow it to lay flat before cooking. This process not only shortens the cooking time but also ensures even cooking.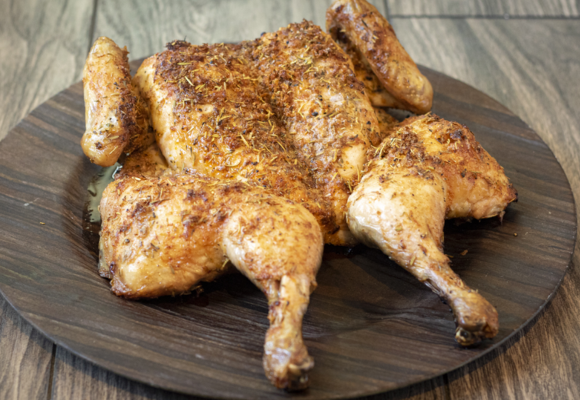
When you spatchcock a chicken before brining, you expose more surface area of the meat to the brine as well make it rinsing the brine quicker, allowing for a more uniform infusion of flavors and moisture. This method is particularly beneficial for those who seek a succulent and flavorful chicken with a crispy skin.
The process begins by placing the chicken breast-side down on a cutting board. Using kitchen shears, you cut along both sides of the backbone, removing it completely. You can then flip the chicken over and press down firmly on the breastbone to flatten it.
Once the chicken is spatchcocked, it’s ready for brining. The brine, typically a mixture of water, salt, and various seasonings, can be customized to your taste. Common additions include sugar, herbs, garlic, and citrus. Submerge the chicken in the brine and refrigerate for several hours, ensuring that the flavors penetrate deeply.
Additionally, spatchcocking before brining can also offer practical benefits. It can be easier to find a container large enough to fit a flattened bird, and the process of handling and maneuvering the bird in and out of the brine can become more manageable.
After brining, the chicken is ready to be cooked. Whether you’re roasting, grilling, or smoking, the spatchcocked chicken will cook more evenly, and the brining will keep the meat moist and flavorful. This preparation method is ideal for those who appreciate the art of cooking and the joy of a well-prepared meal.
Spatchcocking After Brining
As you know brining a chicken is a fantastic way to infuse it with flavor and moisture. However, when you add spatchcocking to the process after brining, you elevate the cooking experience to a new level. This method involves brining the chicken whole and then spatchcocking it just before cooking. This sequence can lead to some unique benefits in the kitchen.
The journey begins with the brining process. You immerse the whole chicken in a flavorful brine, typically a concoction of water, salt, and a variety of seasonings. The brine can be tailored to your taste, with ingredients like brown sugar, herbs, spices, and even fruit for a touch of sweetness. The chicken should be left in the brine for several hours or overnight in the refrigerator, allowing the flavors to thoroughly penetrate the meat.
Once the brining process is complete, the chicken is removed from the brine and patted dry. Now comes the spatchcocking. This technique involves cutting out the backbone of the chicken with kitchen shears or a sharp knife, then pressing down on the breast to flatten the bird. The advantage of spatchcocking after brining is that the whole chicken has had the chance to evenly absorb the brine, enhancing the overall flavor and moisture content.
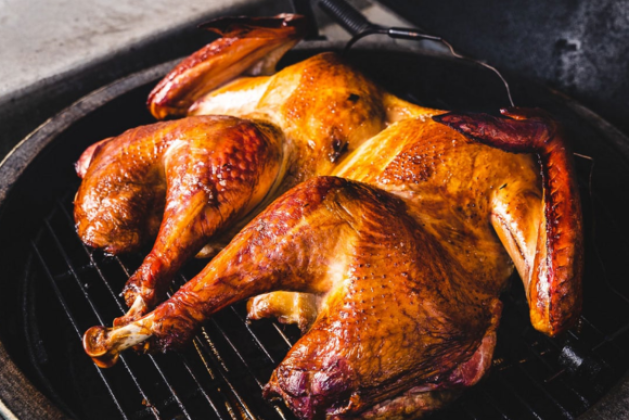
Spatchcocking the brined chicken results in a bird that not only cooks more evenly but also has a greater surface area exposed to the heat. This means crispier skin and a shorter cooking time, whether you’re roasting, grilling, or smoking the chicken. Additionally, the flattened chicken is easier to handle and carve, making it a practical choice for serving.
This method is perfect for those who love the deep, uniform flavor that brining provides and appreciate the even cooking and convenience of a spatchcocked bird. It’s an excellent way to prepare a memorable meal that is both delicious and visually appealing.
Factors to Consider:
- Flavor Distribution: Spatchcocking before brining can lead to a more even distribution of brine flavors.
- Ease of Preparation: Spatchcocking after brining can be slightly more cumbersome but results in a more traditional brining process.
- Cooking Time: Spatchcocking before brining can reduce cooking time significantly.
- Moisture Retention: Brining before spatchcocking might result in slightly better moisture retention throughout the chicken.
What do you remove from turkey before brining?
Preparing a turkey for brining is a crucial step in the cooking process, especially if you’re aiming for a flavorful and juicy outcome. Before you begin the brining process, there are several components you should remove from the turkey to ensure the best possible results.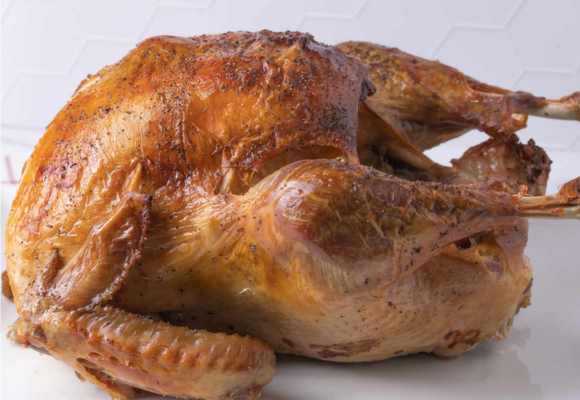
- Giblets and Neck: The first thing to remove from your turkey are the giblets and neck, typically found inside the body cavity. These include the heart, liver, gizzard, and sometimes the neck. These parts are often used for making gravy or stock, so you might want to set them aside rather than discarding them.
- Excess Fat: Look for any excess fat around the cavity opening and the neck area. Trim off this excess fat as it doesn’t contribute to the moistness of the turkey and can affect the texture of the skin after cooking.
- Plastic or Metal Clamps: Some turkeys come with plastic or metal clamps holding the legs together. Remove these clamps before brining, as they can interfere with the brining process and might not be heat-resistant if left on during cooking.
- Pop-up Timers: If your turkey comes with a pop-up timer, it’s best to remove it before brining. These timers can be unreliable, and brining can affect their accuracy. Instead, use a meat thermometer to accurately check the turkey’s internal temperature during cooking.
- Thaw Completely: If your turkey is frozen, ensure it is completely thawed before brining. A frozen turkey will not brine effectively, as the salt solution cannot penetrate the frozen meat.
- Rinse and Pat Dry: Once you’ve removed the giblets, excess fat, clamps, and timer, rinse the turkey thoroughly inside and out under cold water. Then, pat it dry with paper towels. This step is essential to remove any residual blood or fragments from the turkey, providing a clean base for the brine to work effectively.
After completing these steps, your turkey will be ready for brining. This process involves soaking the turkey in a solution of water, salt, and often other flavorings like herbs, sugar, and spices. The brine enhances the turkey’s moisture and flavor, making it a worthwhile step in your holiday meal preparation. Remember, the key to a perfect brined turkey starts with proper preparation, ensuring every bite is as delicious as intended.
Final Thoughts:
As we wrap up our guide on preparing a turkey for brining, it’s clear that the small details can make a significant difference in your culinary endeavors. Removing the giblets, excess fat, clamps, and timers might seem like minor steps, but they are essential for ensuring that your turkey is perfectly prepped for the brining process. A well-prepared turkey not only absorbs the brine more effectively but also cooks more evenly, resulting in a meal that’s as delicious as it is memorable.
Remember, the ultimate goal is to bring joy and flavor to your table. Each step, from cleaning to brining, contributes to this goal, transforming a simple turkey into a festive centerpiece. So, as you embark on your next culinary adventure with turkey, embrace each step with care and enthusiasm. Happy cooking, and may your turkey be a testament to the love and effort you put into your meals.

Leave a comment